 Marvel Vs Capcom (clash of super heroes)
 Street fighter alpha 3
1. First of all you need to have the following:
* A running X, graphical user interface (of course)
* A GCC compiler (its in the Software Development category) * A driver for your video card for faster 3d rendering (For nvidia users www.nvidia.com, for ATI ati.com). Be sure to download and install the latest drivers. Those packages come with a very simple howto on installing the drivers. * The x-mame source code. * An X mame front end.
* ROMS to play with
2. Now go to the xmame website and download the latest source code.
http://x.mame.net/download/xmame-0.106.tar.bz2 (bzip, use the command tar -xjvf to extract)
http://freshrpms.net/rpm/xmame - For those who like to install on the fly.
3. Now we extract the xmame package. For first time users this is how to extract the package.
Using this command as root: tar -xjvf http://x.mame.net/download/xmame-0.106.tar.bz2
4. After its been extraced you can change to that directory by typing: cd xmame-0.106.
5. Now we type: ./configure --prefix=/opt/xmame
Please note that the use of --prefix= is to tell which directory xmame will be installed so you wont have a hard time trying to find and execute it. ok? If youll be getting some errors probably you need to install some of its dependencies which will be said in the error.
6. After it has successfully run the configure script we go now to the next step which is:
Now we type: make && make install
7. Now xmame is successfully installed in the /opt/xmame directory.
8. Now we execute /opt/xmame/bin/xmame.x11 to initialize. Never mind the rom not found errors since we dont have a rom.
9. After initialization the xmame program will create a .xmame directory in your home now we need to create a xmamerc for our personal settings. Heres a sample:
---------------------
### xmame running parameters ###

### Digital sound related ###
# dsp-plugin             (not set)
timer                   0

### Sound mixer related ###
# sound-mixer-plugin     (not set)

### Video Related ###
video-mode              1
heightscale             1
widthscale              1
autodouble              1
artwork                 1
frameskipper            0
throttle                1
sleepidle               1
autoframeskip           1
maxautoframeskip        8
frameskip               0
brightness              1.000000
gamma                   1.000000

### Vector Games Related ###
# vectorres              (not set)
beam                    1.000000
flicker                 0.000000
antialias               1
translucency            1

### X11-window Related ###
cursor                  1
mitshm                  1
xsync                   1
#xil                     1
#mtxil                   0
run-in-root-window      0
root_window_id          0
geometry                800x600

### XFree86 DGA Related ###

### Video Mode Selection Related ###
keepaspect              1
displayaspectratio      1.3333333333333

### X11-input related ###
grabmouse               0
winkeys                 0

### Sound Related ###
samples                 1
samplefreq              44100
bufsize                 3.000000
volume                  -3
# audiodevice            (not set)
# mixerdevice            (not set)

### Input Related ###
joytype                 0
analogstick             0

### Fileio Related ###
rompath                 /home/codehaxor/roms
snapshot_directory      .
cheat_file              /usr/local/share/xmame/cheat.dat
hiscore_file            /usr/local/share/xmame/hiscore.dat

### Mame Related ###
defaultgame             mvsc
language                english
fuzzycmp                1
cheat                   0
# debug                   0

### Frontend Related ###
clones                  1

### Internal verification list commands (only for developers) ###

### Rom Identification Related ###

### General Options ###

### X11 keymapping ###
#
# mapkey ,
#
# Xcode means the HEX code of the key as appears in /usr/include/X11/keysymdef.h
# Scancode means the hexadecimal code that represents the value used for Xmame
#  in keyboard inputs, as defined in src/unix/keyboard.h xmame source file
# IMPORTANT:
# 1- Due to some limitations, only LATIN-1 X-codes ( 0x0000-0x00ff ) and
# Especial X-keycodes ( 0xff00-0xffff ) are supported
# 2- Some keys are keyboard dependent: As Xmame works internally with
# Standard US-AT keyboard codes, you must take care in remmaping some keys
#

# An example: map space as "firebutton" (Mame predefines it as KEY_LCONTROL)
# in symbolic Xlib/Mame notation it should be:
#
# mapkey XK_space,KEY_LCONTROL
#
# So, looking in X11/keysymdef.h and src/unix/keyboard.h, we'll write
# mapkey 0x0020,0x001d
#
# (Other example). To use the F8 key to insert a coin, you should use
mapkey 0xffc5,0x0006

### Suggested German keymap mods by Peter Trauner.
#
#
mapkey 0xfe52,0x0029
mapkey 0x00df,0x000c
mapkey 0xfe51,0x000d
mapkey 0x00fc,0x001a
mapkey 0x002b,0x001b
mapkey 0x00f6,0x0027
mapkey 0x00e4,0x0028
mapkey 0x0023,0x002b
mapkey 0x0059,0x002c
mapkey 0x005a,0x0015
mapkey 0x002d,0x0035

### SDL keymapping ###
#
# sdlmapkey ,
#
# SDLcode means the HEX code of the key as it appears in
#       include/SDL/SDL_keysym.h
# Scancode means the hexadecimal code that represents the value used for Xmame
#  in keyboard inputs, as defined in src/unix/keyboard.h xmame source file
#

# An example: map space as "firebutton" (Mame predefines it as KEY_LCONTROL)
# in symbolic SDL/Mame notation it should be:
#
# sdlmapkey SDLK_SPACE,KEY_LCONTROL
#
# So, looking in X11/keysymdef.h and src/unix/keyboard.h, we'll write
# sdlmapkey 0x0020,0x001d
#
# (Other example). To use the F8 key to insert a coin, you should use
# sdlmapkey 0x0121,0x0006

### Suggested French (azerty) SDL keymap mods by Luc Saillard.
#
#   SDLK_WORLD_18 � => KEY_TILDE
#sdlmapkey 0x00b2,0x0029
#   SDLK_AMPERSAND  => KEY_1
#sdlmapkey 0x0026,0x0002
#   SDLK_WORLD_73 � => KEY_2
#sdlmapkey 0x00e9,0x0003
#   SDLK_QUOTEDBL   => KEY_3
#sdlmapkey 0x0022,0x0004
#   SDLK_QUOTE      => KEY_4
#sdlmapkey 0x0027,0x0005
#   SDLK_LEFTPAREN  => KEY_5
#sdlmapkey 0x0028,0x0006
#   SDLK_MINUS      => KEY_6
#sdlmapkey 0x002d,0x0007
#   SDLK_WORLD_73 � => KEY_7
#sdlmapkey 0x00e8,0x0008
#   SDLK_UNDERSCORE => KEY_8
#sdlmapkey 0x005f,0x0009
#   SDLK_WORLD_71 � => KEY_9
#sdlmapkey 0x00e7,0x000a
#   SDLK_WORLD_64 � => KEY_10
#sdlmapkey 0x00e0,0x000b
#   SDLK_RIGHTPAREN => KEY_11
#sdlmapkey 0x0029,0x000c
#   SDLK_EQUALS     => KEY_12
#sdlmapkey 0x003d,0x000d

#   SDLK_A          => KEY_Q
#sdlmapkey 0x0041,0x0010
#   SDLK_Z          => KEY_W
#sdlmapkey 0x005a,0x0011
#   SDLK_CARET      => KEY_OPENBRACE
#sdlmapkey 0x005e,0x001a
#   SDLK_DOLLAR     => KEY_CLOSEBRACE
#sdlmapkey 0x0024,0x001b

#   SDLK_Q          => KEY_A
#sdlmapkey 0x0051,0x001e
#   SDLK_M          => KEY_COLON
#sdlmapkey 0x004d,0x0027
#   SDLK_WORLD_89 � => KEY_QUOTE
#sdlmapkey 0x00f9,0x0028
#   SDLK_ASTERISK   => KEY_TILDE
#sdlmapkey 0x002a,0x0029

#   SDLK_W          => KEY_Z
#sdlmapkey 0x0057,0x002c
#   SDLK_COMMA      => KEY_M
#sdlmapkey 0x002c,0x0032
#   SDLK_SEMICOLON  => KEY_COMMA
#sdlmapkey 0x003b,0x0033
#   SDLK_COLON      => KEY_STOP
#sdlmapkey 0x003a,0x0034
#   SDLK_EXCLAIM    => KEY_SLASH
#sdlmapkey 0x0021,0x0035
----------------------------------------------
You could either copy this configuration and change the paths to suite your needs. The config file is very easy to understand.
Now we need a front end to make it easy for us to play and load games.
10. The simplest front end is cxmame, it just runs on the terminal, very minimalistic since you can save more memory since its just text based. So more memory for your games.
go to this site and download cxmame: http://yeeking.net/cxmame/index.html#download
The site contains a very simple howto on getting about it.
11. Now extract the package then cd inot the directory and type: ./configure --prefix=/opt/cxmame
12. After that if its successful then type: make && make install
13. You could run cxmame by typing: /opt/cxmame/bin/cxmame
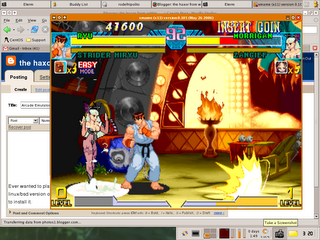
14. Now a screen would appear like this 15. Now the screen would just be simple to understand. You can download roms from http://www.romnation.net/srv/roms.html , Be sure to put them in the directory where you specified your roms to be put in the .xmamerc file ok.
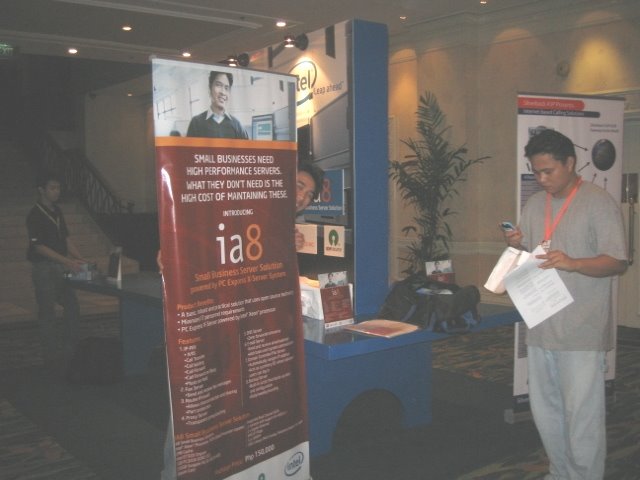 The IA8 Booth . . .
 The IA8 Booth being setup . . .
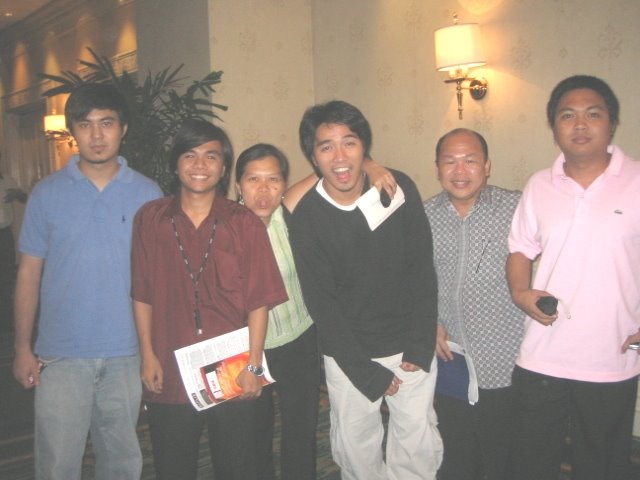 The 8layer People
 Dax demo's the IA8 to an interested client . . .
 Setting up the IA8 For exhibit. Stolen Shot while calling . . .
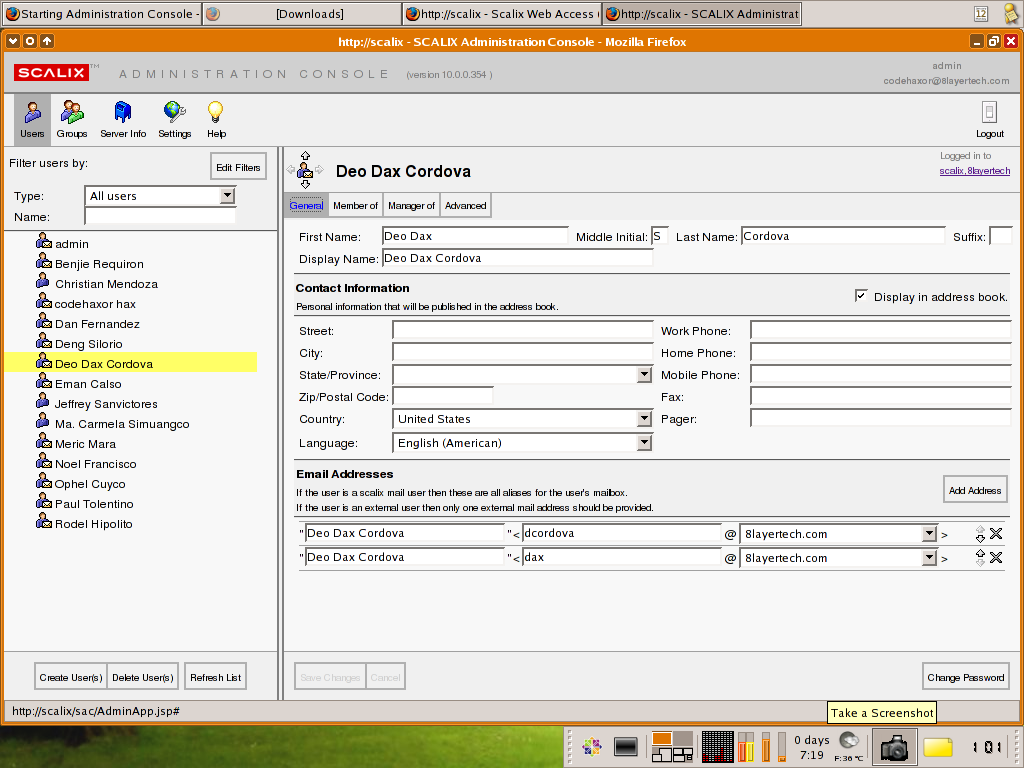
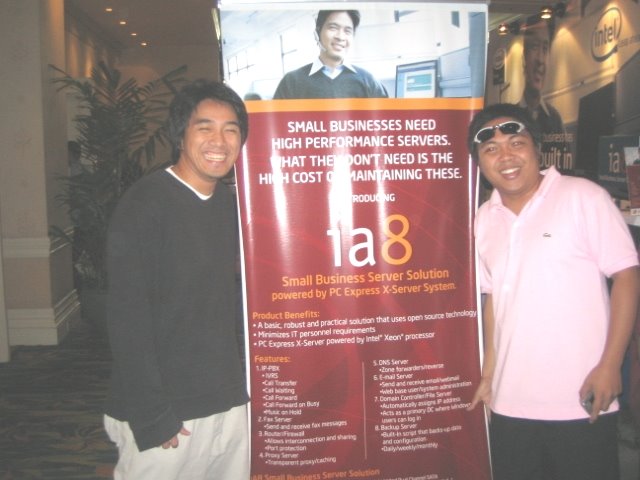 The makers of IA8 (R to L Senior Software Engineer Eman Calso with Senior Linux Solutions Architect Deo Dax Sillero Cordova).